Is your VCDS 15.7 failing to launch, leaving you stranded with automotive diagnostic and coding challenges? Modern car coding requires specialized expertise, and when your tools malfunction, it can halt critical operations. At CAR-CODING.EDU.VN, we provide remote support to get your VCDS and your vehicle back on track quickly and safely. Rely on our expert technicians for ECU programming, hidden feature activation, and permanent fault code clearing, ensuring your diagnostic workflow is uninterrupted.
Contents
- 1. Why Won’t My VCDS 15.7 Open?
- 1.1 Common Reasons VCDS 15.7 Fails to Open:
- 1.2 How to Troubleshoot VCDS 15.7 Opening Issues:
- 2. What Are the Key Features and Capabilities of VCDS 15.7 for Car Coding?
- 2.1 Core Capabilities of VCDS 15.7:
- 2.2 Advanced Coding Features:
- 2.3 Benefits of Using VCDS 15.7 for Car Coding:
- 2.4 Limitations of VCDS 15.7:
- 3. What Are the System Requirements for Running VCDS 15.7?
- 3.1 Minimum Hardware Requirements:
- 3.2 Recommended Hardware:
- 3.3 Software Requirements:
- 3.4 Common Issues Related to System Requirements:
- 3.5 Tips for Ensuring Compatibility:
- 4. What Are the Steps to Properly Install VCDS 15.7 on a Windows PC?
- 4.1 Pre-Installation Checklist:
- 4.2 Installation Steps:
- 4.3 Post-Installation Steps:
- 4.4 Troubleshooting Installation Issues:
- 5. How Do I Update the USB Drivers for My VCDS 15.7 Interface Cable?
- 5.1 Why Update USB Drivers?
- 5.2 Steps to Update USB Drivers:
- 5.3 Manual Driver Installation:
- 5.4 Troubleshooting Driver Issues:
- 6. How Do I Configure the COM Port Settings for VCDS 15.7?
- 6.1 Understanding COM Ports:
- 6.2 Steps to Configure COM Port Settings:
- 6.3 Troubleshooting COM Port Issues:
- 7. What Are Common Error Messages in VCDS 15.7 and How to Resolve Them?
- 7.1 Common VCDS 15.7 Error Messages:
- 7.2 General Troubleshooting Tips:
- 8. What Are the Safety Precautions When Using VCDS 15.7 for Car Coding?
- 8.1 Key Safety Precautions:
- 8.2 Potential Risks of Incorrect Coding:
- 8.3 Best Practices:
- 9. What Are Some Common Coding Procedures That Can Be Performed with VCDS 15.7?
- 9.1 Common Coding Procedures:
1. Why Won’t My VCDS 15.7 Open?
There can be several reasons why your VCDS 15.7 software isn’t opening, ranging from simple installation issues to more complex software conflicts. Addressing these reasons is crucial for getting back to diagnosing and coding vehicles.
1.1 Common Reasons VCDS 15.7 Fails to Open:
- Installation Issues: The software may not have been installed correctly, or some files might be missing or corrupted during the installation process.
- Driver Problems: The USB driver for the VCDS interface cable may not be properly installed or may be outdated.
- Software Conflicts: Other software on your computer could be conflicting with VCDS, especially if they also access the vehicle’s OBD-II port.
- Administrative Rights: VCDS may require administrative rights to run properly, especially when accessing system-level resources.
- Outdated Software: While VCDS 15.7 is an older version, it might still require certain system updates to function correctly on newer operating systems.
- Hardware Issues: Although less common, the VCDS interface cable itself could be faulty.
- Operating System Incompatibilities: Older software versions may not be fully compatible with newer operating systems.
1.2 How to Troubleshoot VCDS 15.7 Opening Issues:
- Reinstall VCDS: Uninstall the software completely and then reinstall it, ensuring you follow the installation instructions closely.
- Update or Reinstall USB Drivers: Go to Device Manager, find your VCDS interface cable, and update the driver. If that doesn’t work, uninstall the driver and then reinstall it using the software provided by Ross-Tech.
- Run as Administrator: Right-click the VCDS shortcut and select “Run as administrator” to provide the necessary permissions.
- Check for Software Conflicts: Temporarily disable other programs that might be interfering with VCDS, such as other diagnostic tools or virtual machine software.
- Update Operating System: Make sure your operating system has all the latest updates and patches installed.
- Test the Cable: Try using the VCDS cable on another computer to see if the problem persists, which could indicate a hardware issue.
- Check Compatibility: Ensure that VCDS 15.7 is compatible with your operating system. If not, consider using a virtual machine with an older, compatible OS.
- Contact Support: If none of these steps work, reach out to Ross-Tech’s support for further assistance.
These steps should help you identify and resolve the issue preventing your VCDS 15.7 software from opening. Addressing the underlying cause will get you back to performing the essential diagnostic and coding tasks needed for vehicle maintenance and repair.
2. What Are the Key Features and Capabilities of VCDS 15.7 for Car Coding?
VCDS (Vag-Com Diagnostic System) 15.7 is a diagnostic tool primarily used for Volkswagen, Audi, Seat, and Skoda vehicles. It provides a range of features for diagnosing, coding, and adapting control modules within these vehicles.
2.1 Core Capabilities of VCDS 15.7:
- Diagnostic Scanning: Performs comprehensive scans of all control modules in the vehicle to identify fault codes.
- Fault Code Reading and Clearing: Reads and clears diagnostic trouble codes (DTCs) from various modules, helping to troubleshoot issues.
- Live Data Monitoring: Displays real-time data from sensors and control modules, which is crucial for diagnosing dynamic issues.
- Control Module Coding: Allows coding of control modules to enable or disable certain features, adjust settings, or match components after replacement.
- Adaptations: Adjusts adaptation values within control modules to fine-tune system behavior, such as idle speed, throttle response, and more.
- Basic Settings: Performs basic settings procedures like throttle body alignment, ABS brake bleeding, and headlight aiming.
- Actuator Tests: Tests the functionality of various actuators and components to verify they are working correctly.
- Service Resets: Resets service reminders and inspection intervals.
- Data Logging: Logs data over time for in-depth analysis of vehicle performance.
2.2 Advanced Coding Features:
- Variant Coding: Modifies the software variant of a control module to match specific vehicle configurations or enable region-specific features.
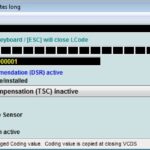
- Long Coding: Allows detailed customization of control module functions through a series of hexadecimal codes, providing extensive control over vehicle settings.
- Security Access: Grants access to protected functions within control modules by entering a specific security code.
- Login Codes: Uses login codes to access certain diagnostic and adaptation functions.
- Module Flashing: Though VCDS 15.7 has limited flashing capabilities compared to newer tools, it can perform some basic module flashing procedures.
2.3 Benefits of Using VCDS 15.7 for Car Coding:
- Extensive Vehicle Coverage: Supports a wide range of VW, Audi, Seat, and Skoda models from the early 1990s up to around 2016.
- User-Friendly Interface: Offers an intuitive interface that is relatively easy to navigate, even for those with limited experience.
- Comprehensive Functionality: Provides a broad set of diagnostic and coding functions in one tool.
- Cost-Effective: Can be more affordable than factory diagnostic tools, especially for independent repair shops.
- Offline Operation: Does not require an internet connection for basic diagnostic and coding functions, making it reliable in areas with poor connectivity.
2.4 Limitations of VCDS 15.7:
- Limited Support for Newer Vehicles: May not support the latest models or control modules introduced after 2016.
- Flashing Capabilities: Limited flashing capabilities compared to more advanced tools.
- Complexity: Some advanced coding and adaptation procedures can be complex and require a good understanding of vehicle systems.
- Risk of Incorrect Coding: Incorrect coding can lead to vehicle malfunctions or damage, so caution and expertise are required.
VCDS 15.7 remains a powerful tool for diagnosing and coding older VW, Audi, Seat, and Skoda vehicles. However, for newer models or more advanced procedures, newer diagnostic tools or expert support may be necessary. CAR-CODING.EDU.VN offers expert remote assistance to help you navigate the complexities of VCDS and ensure successful coding outcomes.
3. What Are the System Requirements for Running VCDS 15.7?
To ensure VCDS 15.7 runs smoothly, it’s important to meet the minimum system requirements. Compatibility issues can lead to the software not opening or functioning correctly.
3.1 Minimum Hardware Requirements:
- Processor: Pentium II 300 MHz or equivalent (or better)
- RAM: 128 MB of RAM
- Hard Drive: 50 MB of free space
- USB Port: One available USB port (1.1 or 2.0)
- Screen Resolution: 800×600 screen resolution
- Operating System: Windows XP, Windows Vista, Windows 7, Windows 8, or Windows 10
3.2 Recommended Hardware:
- Processor: Pentium 4 1.8 GHz or equivalent (or better)
- RAM: 256 MB of RAM or more
- Hard Drive: 100 MB of free space
- USB Port: One available USB port (2.0 recommended)
- Screen Resolution: 1024×768 screen resolution or higher
- Operating System: Windows 7, Windows 8, or Windows 10
3.3 Software Requirements:
- Operating System Compatibility:
- Windows XP (32-bit)
- Windows Vista (32-bit or 64-bit)
- Windows 7 (32-bit or 64-bit)
- Windows 8 and 8.1 (32-bit or 64-bit)
- Windows 10 (32-bit or 64-bit)
- USB Drivers: Correctly installed USB drivers for the Ross-Tech interface cable
- .NET Framework: VCDS 15.7 may require an older version of the .NET Framework, which can be downloaded from Microsoft’s website if not already installed.
- Administrative Rights: The software should be run with administrative privileges for full access to system resources.
3.4 Common Issues Related to System Requirements:
- Insufficient RAM: Can cause the software to run slowly or crash.
- Low Disk Space: May prevent the software from installing or running correctly.
- Incompatible Operating System: Using an unsupported operating system can lead to various issues, including the software not opening.
- Driver Issues: Incorrectly installed or outdated USB drivers are a frequent cause of connectivity problems between the computer and the vehicle.
- Missing .NET Framework: Some versions of VCDS require the .NET Framework to be installed.
3.5 Tips for Ensuring Compatibility:
- Check Compatibility: Verify that your operating system is compatible with VCDS 15.7 before installation.
- Update Drivers: Always use the latest USB drivers provided by Ross-Tech for the interface cable.
- Run as Administrator: Right-click the VCDS shortcut and select “Run as administrator.”
- Close Unnecessary Programs: Close other programs that may be consuming system resources.
- Use a Dedicated Laptop: Consider using a dedicated laptop for automotive diagnostics to avoid software conflicts and ensure optimal performance.
- Virtual Machines: If you need to run VCDS on a newer operating system that is not fully compatible, use a virtual machine with a compatible OS (e.g., Windows XP or Windows 7).
Meeting these system requirements will help ensure that VCDS 15.7 runs smoothly and reliably, allowing you to perform accurate diagnostics and coding.
4. What Are the Steps to Properly Install VCDS 15.7 on a Windows PC?
Proper installation of VCDS 15.7 on your Windows PC is critical for the software to function correctly. Following these steps will help you avoid common installation issues and ensure a smooth setup.
4.1 Pre-Installation Checklist:
- Download the Software: Download the VCDS 15.7 installation file from the official Ross-Tech website or a trusted source.
- Check System Requirements: Ensure your computer meets the minimum system requirements for VCDS 15.7 (as outlined in Section 3).
- Disable Antivirus: Temporarily disable your antivirus software, as it can sometimes interfere with the installation process.
- Close Other Programs: Close all other programs running on your computer to free up system resources.
4.2 Installation Steps:
- Run the Installer: Locate the downloaded VCDS 15.7 installation file (usually a .exe file) and double-click it to run the installer.
- Grant Permissions: If prompted by User Account Control (UAC), grant the installer administrative privileges by clicking “Yes.”
- Follow the Wizard: The VCDS installation wizard will guide you through the setup process. Click “Next” to proceed.
- Accept the License Agreement: Read the license agreement carefully, and if you agree to the terms, select “I accept the agreement” and click “Next.”
- Choose Installation Location: Select the destination folder where you want to install VCDS. The default location is usually
C:Ross-TechVCDS. You can change it if desired, but it’s generally best to keep the default. Click “Next.” - Select Start Menu Folder: Choose a Start Menu folder for the VCDS shortcut. The default is “Ross-Tech VCDS.” Click “Next.”
- Install USB Drivers: The installer will prompt you to install the USB drivers for the Ross-Tech interface cable. Follow the on-screen instructions to install the drivers. Make sure your interface cable is not connected to the computer during the driver installation process.
- Complete Installation: Click “Install” to begin the installation process. The installer will copy the necessary files to your computer.
- Finish Installation: Once the installation is complete, click “Finish” to exit the installation wizard. You may be prompted to restart your computer. If so, restart your computer to ensure all changes are applied.
4.3 Post-Installation Steps:
- Connect the Interface Cable: Connect the Ross-Tech interface cable to your computer’s USB port.
- Launch VCDS: Double-click the VCDS shortcut on your desktop or in the Start Menu to launch the software.
- Test the Interface: In VCDS, go to “Options” and select your interface cable from the “Select Interface” dropdown menu. Click “Test” to verify that VCDS can communicate with the interface cable.
- Activate the Software: If you have a licensed version of VCDS, enter your license key in the activation window.
- Update the Software: Check for updates to ensure you have the latest version of VCDS.
- Configure Settings: Configure other settings as needed, such as language, measuring units, and COM port settings.
4.4 Troubleshooting Installation Issues:
- Installation Errors: If you encounter any errors during the installation process, make sure you have administrative privileges and that your antivirus software is disabled.
- Driver Problems: If the USB drivers are not installed correctly, go to Device Manager, find your VCDS interface cable, and update the driver manually.
- Software Conflicts: Temporarily disable other programs that might be interfering with VCDS.
- Compatibility Issues: If you are running an older operating system, try running the installer in compatibility mode.
By following these steps, you should be able to successfully install VCDS 15.7 on your Windows PC and start using it for vehicle diagnostics and coding. If you encounter any persistent issues, CAR-CODING.EDU.VN can provide remote assistance to help you troubleshoot and resolve them.
5. How Do I Update the USB Drivers for My VCDS 15.7 Interface Cable?
Keeping the USB drivers for your VCDS 15.7 interface cable up-to-date is essential for reliable communication between your computer and the vehicle. Here’s how to update the drivers properly:
5.1 Why Update USB Drivers?
- Improved Compatibility: Updated drivers ensure compatibility with the latest operating systems and hardware.
- Enhanced Stability: Newer drivers often include bug fixes and stability improvements, reducing the risk of communication errors.
- Better Performance: Updated drivers can improve the speed and efficiency of data transfer between the computer and the vehicle.
- Fixing Issues: Updating drivers can resolve connectivity problems, such as VCDS not recognizing the interface cable.
5.2 Steps to Update USB Drivers:
- Open Device Manager:
- Windows 7: Click the Start button, right-click “Computer,” and select “Manage.” In the Computer Management window, click “Device Manager” in the left pane.
- Windows 8/8.1/10: Right-click the Start button (or press Windows key + X) and select “Device Manager.”
- Locate the VCDS Interface Cable: In Device Manager, look for the VCDS interface cable. It is typically listed under “Ports (COM & LPT)” or “Unknown devices.” If the driver is not installed correctly, it might appear with a yellow exclamation mark.
- Update Driver:
- Right-click on the VCDS interface cable and select “Update Driver Software…”
- Choose Driver Update Method:
- Automatic Update: Select “Search automatically for updated driver software.” Windows will search your computer and the internet for the latest driver software.
- Manual Update: If you have downloaded the latest driver software from Ross-Tech, select “Browse my computer for driver software.” Navigate to the folder where you saved the driver files and click “Next.”
- Install Driver: Follow the on-screen instructions to install the driver. If prompted, allow Windows to install the driver software.
- Verify Installation: After the driver is installed, check Device Manager again to make sure the VCDS interface cable is listed correctly and there are no errors.
5.3 Manual Driver Installation:
If the automatic update method does not work, you can manually install the USB drivers using the following steps:
- Download Driver: Download the latest USB drivers for your VCDS interface cable from the Ross-Tech website.
- Extract Files: Extract the contents of the downloaded ZIP file to a folder on your computer.
- Open Device Manager: Follow the steps above to open Device Manager.
- Locate the VCDS Interface Cable: Find the VCDS interface cable in Device Manager.
- Update Driver: Right-click on the VCDS interface cable and select “Update Driver Software…”
- Browse for Driver: Select “Browse my computer for driver software.”
- Navigate to Driver Folder: Click “Browse…” and navigate to the folder where you extracted the USB driver files. Make sure to select the folder that contains the
.inffile. - Install Driver: Click “Next” to install the driver.
- Ignore Warnings: If you receive a warning message about driver compatibility, click “Install this driver software anyway” to proceed.
- Verify Installation: Check Device Manager to ensure the VCDS interface cable is listed correctly and there are no errors.
5.4 Troubleshooting Driver Issues:
- Driver Not Found: If Windows cannot find the driver software, make sure you have downloaded the correct driver for your operating system and that you have extracted the files correctly.
- Driver Installation Errors: If you encounter errors during the driver installation process, try running the installer as an administrator.
- Conflicting Drivers: If you have previously installed other USB drivers that might be conflicting with the VCDS drivers, uninstall them before installing the new drivers.
- Roll Back Driver: If the updated driver causes problems, you can roll back to the previous driver by right-clicking the VCDS interface cable in Device Manager, selecting “Properties,” going to the “Driver” tab, and clicking “Roll Back Driver.”
Keeping your USB drivers up-to-date ensures that your VCDS 15.7 interface cable works reliably, allowing you to perform accurate diagnostics and coding. If you need further assistance, CAR-CODING.EDU.VN offers remote support to help you update and troubleshoot your VCDS setup.
6. How Do I Configure the COM Port Settings for VCDS 15.7?
Configuring the correct COM port settings in VCDS 15.7 is essential for establishing communication between your computer and the vehicle. Here’s how to configure these settings:
6.1 Understanding COM Ports:
- What is a COM Port? A COM (communication) port is a serial port interface on a computer that allows it to communicate with external devices. In the context of VCDS, the COM port is used to connect the VCDS interface cable to the computer.
- Why Configure COM Ports? VCDS needs to know which COM port your interface cable is connected to in order to communicate with the vehicle’s diagnostic system. If the COM port is not configured correctly, VCDS will not be able to connect to the vehicle.
6.2 Steps to Configure COM Port Settings:
- Determine the COM Port:
- Open Device Manager:
- Windows 7: Click the Start button, right-click “Computer,” and select “Manage.” In the Computer Management window, click “Device Manager” in the left pane.
- Windows 8/8.1/10: Right-click the Start button (or press Windows key + X) and select “Device Manager.”
- Locate the VCDS Interface Cable: In Device Manager, expand “Ports (COM & LPT).” Look for your VCDS interface cable. It will typically be listed as “Ross-Tech USB Interface” followed by the COM port number in parentheses (e.g., “Ross-Tech USB Interface (COM3)”).
- Note the COM Port Number: Make note of the COM port number assigned to the VCDS interface cable.
- Open Device Manager:
- Open VCDS: Launch the VCDS software on your computer.
- Go to Options: In VCDS, click the “Options” button.
- Select COM Port: In the Options window, find the “PC Interface” section.
- Select COM Port: Use the drop-down menu to select the COM port number that you identified in Device Manager.
- Test the Connection: Click the “Test” button next to the COM port selection. VCDS will attempt to communicate with the interface cable.
- Verify Results:
- Interface Found: If the test is successful, VCDS will display a message indicating that the interface cable was found and is working correctly.
- Interface Not Found: If the test fails, VCDS will display an error message indicating that it could not communicate with the interface cable. In this case, double-check the COM port number, ensure the interface cable is properly connected, and try again.
- Save Settings: Click “OK” to save the COM port settings and close the Options window.
6.3 Troubleshooting COM Port Issues:
- COM Port Not Listed: If the COM port is not listed in the VCDS Options window, make sure the VCDS interface cable is properly connected to your computer and that the USB drivers are installed correctly.
- Communication Errors: If you are experiencing communication errors between VCDS and the vehicle, double-check the COM port settings and try a different COM port if available.
- COM Port Conflicts: Other devices on your computer might be using the same COM port as the VCDS interface cable. In this case, you can try changing the COM port number in Device Manager:
- Open Device Manager: Follow the steps above to open Device Manager.
- Locate the VCDS Interface Cable: Find the VCDS interface cable in Device Manager.
- Open Properties: Right-click on the VCDS interface cable and select “Properties.”
- Go to Port Settings: In the Properties window, go to the “Port Settings” tab.
- Click Advanced: Click the “Advanced…” button.
- Change COM Port Number: Use the “COM Port Number” drop-down menu to select a different COM port number that is not currently in use.
- Save Changes: Click “OK” to save the changes and close the Properties window.
- Test in VCDS: Repeat the steps above to configure the new COM port number in VCDS and test the connection.
Configuring the correct COM port settings is a critical step in setting up VCDS 15.7 for vehicle diagnostics and coding. By following these steps and troubleshooting any issues that arise, you can ensure reliable communication between your computer and the vehicle. If you need further assistance, CAR-CODING.EDU.VN offers remote support to help you configure your VCDS setup.
7. What Are Common Error Messages in VCDS 15.7 and How to Resolve Them?
Encountering error messages while using VCDS 15.7 is not uncommon. Understanding these messages and knowing how to resolve them can save you time and frustration.
7.1 Common VCDS 15.7 Error Messages:
-
“Interface Not Found” or “Port Not Ready”:
- Description: VCDS cannot detect the interface cable.
- Possible Causes:
- Interface cable not connected properly.
- Incorrect COM port selected.
- USB drivers not installed or outdated.
- Faulty interface cable.
- Solutions:
- Ensure the interface cable is securely connected to your computer and the vehicle.
- Verify the correct COM port is selected in VCDS Options.
- Update the USB drivers for the interface cable.
- Test the interface cable on another computer.
-
“Controller Not Responding” or “No Response from Controller”:
- Description: VCDS cannot communicate with the selected control module in the vehicle.
- Possible Causes:
- Incorrect control module selected.
- Ignition not turned on.
- Faulty wiring or connections.
- Defective control module.
- Solutions:
- Verify you have selected the correct control module.
- Ensure the vehicle’s ignition is turned on.
- Check the wiring and connections to the control module.
- Try connecting to other control modules to see if the issue is isolated to one module.
-
“Function Not Supported” or “Coding Not Accepted”:
- Description: The selected function or coding is not supported by the control module or VCDS version.
- Possible Causes:
- VCDS version is outdated.
- Control module does not support the selected function.
- Incorrect coding entered.
- Security access required.
- Solutions:
- Update VCDS to the latest version.
- Verify that the control module supports the selected function in the vehicle’s documentation.
- Double-check the coding you entered for errors.
- Enter the correct security access code if required.
-
“Security Access Denied” or “Login Incorrect”:
- Description: VCDS cannot access certain functions because the security access code or login is incorrect.
- Possible Causes:
- Incorrect security access code entered.
- Login code not required for the selected function.
- Solutions:
- Verify you have entered the correct security access code for the control module.
- Consult the Ross-Tech Wiki or vehicle’s documentation for the correct security access code.
- Try leaving the security access code field blank if it is not required.
-
“Data Too Short” or “Data Too Long”:
- Description: The data you are trying to send to the control module is either too short or too long.
- Possible Causes:
- Incorrect coding or adaptation values entered.
- VCDS software bug.
- Solutions:
- Double-check the coding or adaptation values for errors.
- Try using a different VCDS version or computer.
- Contact Ross-Tech support for assistance.
-
“Timeout Error” or “Communication Error”:
- Description: VCDS lost communication with the control module during a diagnostic or coding procedure.
- Possible Causes:
- Loose connections.
- Electrical interference.
- Low battery voltage.
- Faulty control module.
- Solutions:
- Check all connections between the interface cable, computer, and vehicle.
- Minimize electrical interference by turning off unnecessary devices.
- Ensure the vehicle’s battery has sufficient voltage.
- Try connecting to other control modules to see if the issue is isolated to one module.
7.2 General Troubleshooting Tips:
- Restart VCDS: Close and reopen VCDS to clear any temporary issues.
- Reboot Computer: Restart your computer to resolve software conflicts or resource allocation problems.
- Check Battery Voltage: Ensure the vehicle’s battery has sufficient voltage. Low voltage can cause communication errors.
- Disable Antivirus: Temporarily disable your antivirus software, as it can sometimes interfere with VCDS.
- Update VCDS: Keep VCDS updated to the latest version to benefit from bug fixes and improved compatibility.
- Use Ross-Tech Wiki: Consult the Ross-Tech Wiki for detailed information on error codes and troubleshooting tips.
- Contact Support: If you are unable to resolve the issue, contact Ross-Tech support for assistance.
By understanding these common error messages and following the troubleshooting tips, you can effectively diagnose and resolve issues encountered while using VCDS 15.7. If you need expert assistance, CAR-CODING.EDU.VN offers remote support to help you troubleshoot and resolve VCDS errors.
8. What Are the Safety Precautions When Using VCDS 15.7 for Car Coding?
Using VCDS 15.7 for car coding can be a powerful way to customize and enhance your vehicle’s functionality, but it’s essential to take proper safety precautions to avoid causing damage or malfunctions.
8.1 Key Safety Precautions:
- Battery Voltage:
- Stable Voltage: Ensure the vehicle’s battery has a stable voltage, ideally above 12.5V. Low voltage can lead to communication errors and incomplete coding procedures.
- Battery Charger: Use a battery charger or maintainer to keep the battery voltage stable during coding, especially for lengthy procedures.
- Correct Software:
- Use Correct Version: Always use the correct version of VCDS for your vehicle model and control modules.
- Genuine Software: Use genuine VCDS software from Ross-Tech or an authorized dealer to avoid using pirated or modified software that could damage your vehicle.
- Reliable Connection:
- Secure Connection: Ensure a secure and reliable connection between the VCDS interface cable, your computer, and the vehicle’s OBD-II port.
- Avoid Interference: Minimize electrical interference by turning off unnecessary devices and ensuring the area is free from strong electromagnetic fields.
- Proper Documentation:
- Consult Documentation: Always consult the Ross-Tech Wiki, vehicle repair manuals, and other reliable sources for accurate coding information.
- Understand Coding Procedures: Make sure you fully understand the coding procedures before making any changes.
- Backup Original Coding:
- Record Original Settings: Before making any coding changes, record the original coding settings for each control module.
- Save Adaptation Values: Save adaptation values and other relevant data in case you need to revert to the original settings.
- Coding Order:
- Follow Correct Order: Follow the correct order of coding procedures to avoid conflicts and errors.
- Complete Procedures: Complete each coding procedure fully and avoid interrupting it.
- Security Access Codes:
- Use Correct Codes: Always use the correct security access codes or login codes when required.
- Verify Codes: Verify the security access codes with reliable sources to ensure they are accurate.
- Avoid Distractions:
- Focus: Avoid distractions during coding procedures to minimize the risk of errors.
- Concentrate: Concentrate on each step and double-check your work before proceeding.
- Test After Coding:
- Verify Functionality: After making coding changes, test the functionality of the affected systems to ensure they are working correctly.
- Check for Errors: Check for any new error codes and address them promptly.
- Professional Assistance:
- Seek Expert Help: If you are unsure about any coding procedure, seek assistance from a qualified technician or expert.
- Remote Support: Consider using remote support services like CAR-CODING.EDU.VN for guidance and assistance.
8.2 Potential Risks of Incorrect Coding:
- Malfunctions: Incorrect coding can cause various vehicle systems to malfunction, such as the engine, transmission, ABS, airbags, and more.
- Damage: Incorrect coding can damage control modules or other vehicle components.
- Safety Issues: Incorrect coding can compromise safety systems, such as airbags and ABS, increasing the risk of accidents.
- Warranty Issues: Incorrect coding can void your vehicle’s warranty.
8.3 Best Practices:
- Start Simple: Begin with simple coding changes and gradually move to more complex procedures as you gain experience.
- Test Thoroughly: Test all affected systems thoroughly after making any coding changes.
- Keep Records: Keep detailed records of all coding changes you make, including the date, time, control module, original settings, and new settings.
- Stay Informed: Stay informed about the latest coding information and best practices by consulting reliable sources and forums.
By following these safety precautions, you can minimize the risk of damage or malfunctions while using VCDS 15.7 for car coding. If you need expert guidance and support, CAR-CODING.EDU.VN offers remote assistance to ensure safe and successful coding outcomes.
9. What Are Some Common Coding Procedures That Can Be Performed with VCDS 15.7?
VCDS 15.7 allows you to perform a variety of coding procedures to customize and enhance your vehicle’s functionality. Here are some common coding procedures that can be performed:
9.1 Common Coding Procedures:
- Activating Hidden Features:
- Description: Enable features that are present in the vehicle but are disabled by default.
- Examples:
- Enabling cornering fog lights
- Activating coming home/leaving home lights
- Enabling daytime running lights (DRL)
- Activating emergency brake flashing
- Adjusting Lighting Settings:
- Description: Customize the behavior of the vehicle’s lights.
- Examples:
- Adjusting DRL brightness
- Changing turn signal behavior
- Enabling/disabling headlight washers
- Adjusting headlight aiming
- Customizing Comfort Features:
- Description: Modify comfort-related settings.
- Examples:
- Enabling/disabling automatic door locking
- Adjusting window behavior
- Customizing remote key functions
- Adjusting climate control settings
- Enabling/Disabling Warning Chimes:
- Description: Customize or disable certain warning chimes.
- Examples:
- Disabling seat belt chime
- Disabling key-in-ignition chime
- Adjusting volume of parking sensor beeps
- Adjusting Instrument Cluster Settings:
- Description: Modify the display and behavior of the instrument cluster.
- Examples:
- Adjusting display language
- Enabling/disabling needle sweep on startup
- Displaying battery voltage
- Adjusting service interval reminders
- Enabling/Disabling Electronic Stability Control (ESC) Features:
- Description: Customize the behavior of the ESC system.
- Examples:
- Enabling/disabling ESC completely
- Adjusting ESC intervention levels
- Enabling torque vectoring
- Retrofitting Equipment:
- Description: Code control modules to recognize and properly operate retrofitted equipment.
- Examples:
- Retrofitting a new radio or navigation system
- Retrofitting parking sensors
- Retrofitting a rearview camera
- Retrofitting LED headlights
- Adjusting Engine and Transmission Settings:
- Description: Modify engine and transmission settings for performance or efficiency.
- Examples:
- Adjusting throttle response
- Adjusting shift points
- Enabling launch control
- Disabling EGR (Exhaust Gas Recirculation)
- Adjusting Central Electronics Settings:
- Description: Modify settings related to central locking, alarm system, and other electronic functions.
- Examples:
- Enabling/disabling selective unlocking
- Adjusting alarm sensitivity
- Customizing remote key functions
- Clearing Fault Codes:
- Description: Clear diagnostic trouble codes (DTCs) from various control modules.
- Examples: