Modern car coding can be intricate, and disabling Daytime Running Lights (DRL) via VCDS requires expertise. CAR-CODING.EDU.VN offers remote assistance, ensuring safe and effective modifications. Contact us for expert help with ECU programming, activating hidden features, and more.
Contents
- 1. What is VCDS DRL Coding and Why is it Important?
- 1.1. Understanding Daytime Running Lights (DRL)
- 1.2. The Role of VCDS in Car Coding
- 1.3. Why Modify DRL Settings?
- 1.4. Potential Risks of Incorrect Coding
- 1.5. The Importance of Professional Assistance
- 2. What are the Primary Reasons for Disabling DRLs?
- 2.1. Personal Aesthetic Preferences
- 2.2. Avoiding Glare or Light Pollution
- 2.3. Special Situations (e.g., Drive-In Theaters)
- 2.4. Temporary Deactivation for Diagnostic Purposes
- 2.5. Custom Lighting Setups
- 2.6. Minimizing Energy Consumption
- 2.7. Compliance with Specific Local Regulations
- 2.8. Preventing Unnecessary Attention
- 2.9. Extending Bulb Life
- 2.10. Reducing Heat Buildup in Enclosed Spaces
- 3. What is the Process for Disabling DRLs with VCDS?
- 3.1. Initial Setup and Connection
- 3.2. Accessing the Central Electronics Control Module
- 3.3. Identifying the DRL Coding Options
- 3.4. Modifying the Coding to Disable DRLs
- 3.5. Verifying the Changes
- 3.6. Restoring Original Settings (If Necessary)
- 3.7. Using Adaptation Channels
- 3.8. Example Coding Scenario
- 3.9. Potential Complications and Troubleshooting
- 3.10. Seeking Expert Assistance from CAR-CODING.EDU.VN
- 4. What are the Specific VCDS Coding Locations for DRLs on Different Audi Models?
- 4.1. Long Coding vs. Adaptation Channels
- 4.2. Step-by-Step Guide for Long Coding
- 4.3. Step-by-Step Guide for Adaptation Channels
- 4.4. Examples of Specific Coding Changes
- 4.5. Common Issues and How to Resolve Them
- 4.6. Why Choose CAR-CODING.EDU.VN for Assistance?
- 5. How to Use VCDS to Enable or Disable DRLs Based on Handbrake Position?
- 5.1. Understanding the Logic
- 5.2. Step-by-Step Guide for Enabling/Disabling DRLs with Handbrake
- 5.3. Example Coding Scenario
- 5.4. Using Adaptation Channels for Handbrake DRL Control
- 5.5. Common Issues and Troubleshooting
- 5.6. Importance of Correct Handbrake Signal
- 5.7. Why Professional Assistance is Recommended
- 6. What are the Common Problems Encountered While Coding DRLs and How to Fix Them?
- 6.1. VCDS Not Connecting to the Vehicle
- 6.2. Incorrect Coding String
- 6.3. Fault Codes After Coding
- 6.4. DRLs Not Responding as Expected
- 6.5. Adaptation Channels Not Available
- 6.6. Security Access Required
- 6.7. VCDS Software Errors
- 6.8. Module Not Responding
- 6.9. Seeking Expert Assistance from CAR-CODING.EDU.VN
1. What is VCDS DRL Coding and Why is it Important?
Vcds Drl coding involves using the VCDS (VAG-COM Diagnostic System) software to modify the behavior of Daytime Running Lights (DRL) on vehicles manufactured by Volkswagen, Audi, Skoda, and SEAT. This process allows technicians and enthusiasts to customize when and how the DRLs operate, tailoring them to specific preferences or legal requirements. Understanding the importance of proper coding is crucial because incorrect modifications can lead to unexpected behavior or even system malfunctions.
1.1. Understanding Daytime Running Lights (DRL)
Daytime Running Lights (DRL) are designed to increase the visibility of a vehicle during daylight conditions. They automatically activate when the engine is running, enhancing safety by making the vehicle more noticeable to other drivers, pedestrians, and cyclists. According to studies, vehicles equipped with DRLs have a lower risk of being involved in daytime collisions. DRLs are particularly effective in conditions with reduced visibility, such as dawn, dusk, and overcast weather.
1.2. The Role of VCDS in Car Coding
VCDS (VAG-COM Diagnostic System) is a comprehensive diagnostic tool developed by Ross-Tech for Volkswagen, Audi, Skoda, and SEAT vehicles. It allows users to access, diagnose, and modify various electronic control units (ECUs) within the car. VCDS provides a user-friendly interface to perform tasks such as reading fault codes, viewing live data, performing output tests, and coding control modules. Its capabilities extend to enabling or disabling features, adjusting settings, and customizing vehicle behavior.
1.3. Why Modify DRL Settings?
Modifying DRL settings can be driven by various reasons, including personal preference, compliance with local regulations, or specific functional needs.
- Personal Preference: Some vehicle owners prefer to have more control over their DRLs, such as the ability to disable them under certain conditions or customize their brightness.
- Legal Requirements: In certain regions, specific DRL configurations may be required or prohibited, necessitating coding adjustments.
- Functional Needs: Technicians may need to disable DRLs temporarily during diagnostic procedures or when performing modifications to the vehicle’s lighting system.
1.4. Potential Risks of Incorrect Coding
Incorrect VCDS coding can lead to a range of problems, including:
- Malfunctioning Lights: Improper coding can cause DRLs to flicker, fail to activate, or remain on when they should be off.
- Error Codes: Incorrect settings can trigger diagnostic trouble codes (DTCs), which may affect other vehicle systems.
- System Instability: In some cases, incorrect coding can destabilize the vehicle’s electrical system, leading to unpredictable behavior or even component damage.
- Voided Warranty: Unauthorized modifications to the vehicle’s software can potentially void the manufacturer’s warranty.
- Safety Issues: DRLs are designed to enhance safety, and disabling or improperly configuring them can reduce the vehicle’s visibility, increasing the risk of accidents.
1.5. The Importance of Professional Assistance
Due to the complexities and potential risks involved, it is essential to seek professional assistance when performing VCDS DRL coding. CAR-CODING.EDU.VN offers expert remote support, ensuring that all modifications are carried out safely and effectively. Our experienced technicians have in-depth knowledge of VCDS and vehicle electrical systems, minimizing the risk of errors and ensuring optimal results.
2. What are the Primary Reasons for Disabling DRLs?
There are several reasons why someone might want to disable Daytime Running Lights (DRL) using VCDS, ranging from personal preference to specific functional needs. CAR-CODING.EDU.VN can assist with all these scenarios.
2.1. Personal Aesthetic Preferences
Some vehicle owners simply prefer the look of their car without DRLs. They may feel that the lights detract from the vehicle’s overall appearance or prefer a more classic aesthetic. Disabling DRLs allows them to customize their car’s look to match their individual style.
2.2. Avoiding Glare or Light Pollution
In certain situations, DRLs can cause glare or contribute to light pollution, particularly in densely populated areas or during nighttime driving in specific environments. Some drivers may choose to disable DRLs to minimize these effects.
2.3. Special Situations (e.g., Drive-In Theaters)
There are specific situations where DRLs can be a nuisance. For example, at drive-in theaters, the constant illumination of DRLs can be distracting to other moviegoers. Disabling them temporarily allows for a more considerate and enjoyable experience.
2.4. Temporary Deactivation for Diagnostic Purposes
Technicians often need to disable DRLs temporarily while performing diagnostic tests or repairs on a vehicle’s electrical system. This prevents the lights from interfering with testing procedures and ensures accurate results.
2.5. Custom Lighting Setups
Enthusiasts who install aftermarket lighting systems may want to disable the factory DRLs to ensure that their custom setups function correctly and achieve the desired aesthetic effect. This allows for seamless integration and avoids conflicts between the factory and aftermarket lights.
2.6. Minimizing Energy Consumption
Although DRLs typically consume minimal energy, some environmentally conscious drivers may choose to disable them to reduce their vehicle’s overall energy consumption. While the impact is small, it aligns with a broader effort to conserve energy and reduce emissions.
2.7. Compliance with Specific Local Regulations
In some regions, specific regulations may restrict or prohibit the use of DRLs under certain conditions. Disabling DRLs ensures compliance with these local laws and avoids potential fines or legal issues.
2.8. Preventing Unnecessary Attention
In certain situations, DRLs may attract unwanted attention to the vehicle. For example, in areas with heightened security concerns or during covert operations, disabling DRLs can help maintain a low profile.
2.9. Extending Bulb Life
Some drivers believe that disabling DRLs can extend the lifespan of the DRL bulbs. While modern LED DRLs are designed to last a long time, older halogen or incandescent bulbs may benefit from reduced usage.
2.10. Reducing Heat Buildup in Enclosed Spaces
In some vehicles, DRLs can generate heat, especially in enclosed spaces. Disabling them can help reduce heat buildup, which may be desirable in hot climates or when the vehicle is parked in direct sunlight.
3. What is the Process for Disabling DRLs with VCDS?
Disabling Daytime Running Lights (DRL) using VCDS involves a systematic process of connecting to the vehicle’s ECU, accessing the relevant control module, and modifying the coding settings. CAR-CODING.EDU.VN provides step-by-step guidance to ensure a smooth and successful procedure.
3.1. Initial Setup and Connection
The first step is to ensure that you have the necessary equipment:
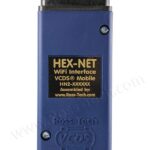
- VCDS Software: The latest version of the VCDS software installed on a Windows-based laptop.
- VCDS Interface Cable: A genuine VCDS interface cable from Ross-Tech to connect the laptop to the vehicle’s OBD-II port.
- Vehicle Compatibility: Confirm that your vehicle is compatible with VCDS and that the specific DRL coding options are available for your model and year.
Once you have the equipment, follow these steps:
- Connect the VCDS cable to the OBD-II port of your vehicle, typically located under the dashboard on the driver’s side.
- Turn on the ignition but do not start the engine.
- Launch the VCDS software on your laptop.
- Test the connection by clicking the “Options” button in VCDS and selecting the correct COM port. Click “Test” to verify that VCDS can communicate with the vehicle.
3.2. Accessing the Central Electronics Control Module
The DRL settings are usually located within the Central Electronics Control Module (Module 09). To access this module:
- Click the “Select” button on the main screen of VCDS.
- Enter “09” in the address field and click “OK.” This will connect you to the Central Electronics Control Module.
3.3. Identifying the DRL Coding Options
Once you are in the Central Electronics Control Module, you need to identify the specific coding options related to DRLs. This can be done through several methods:
- Coding Helper: Click the “Coding” button. VCDS will display the current coding string for the module. Click the “Long Coding Helper” button to open a window that provides a detailed description of each byte and bit.
- Bit-by-Bit Examination: Examine each byte and bit in the Long Coding Helper to find the options related to DRL control. Look for descriptions that mention “Daytime Running Lights,” “DRL,” or similar terms.
- Adaptation Channels: Some DRL settings may be located in the Adaptation channels. Click the “Adaptation” button and browse through the available channels to find DRL-related settings.
3.4. Modifying the Coding to Disable DRLs
Once you have identified the correct coding options, you can modify them to disable the DRLs:
- Uncheck the relevant box in the Long Coding Helper to disable the DRL feature. For example, if there is a bit labeled “Daytime Running Lights active,” unchecking this box will deactivate the DRLs.
- Note the original coding before making any changes. This will allow you to revert to the original settings if needed.
- Enter the modified coding into the coding field.
- Click “Do It!” to save the changes. VCDS will display a confirmation message.
3.5. Verifying the Changes
After modifying the coding, it is essential to verify that the changes have been applied correctly:
- Turn off the ignition and wait a few seconds.
- Turn the ignition back on and check if the DRLs are now disabled.
- Check for fault codes by clicking the “Fault Codes” button in VCDS. Clear any new fault codes that may have appeared as a result of the coding changes.
- Test the vehicle under various conditions to ensure that the DRLs remain off as intended and that no other systems are adversely affected.
3.6. Restoring Original Settings (If Necessary)
If you encounter any issues or wish to revert to the original settings, follow these steps:
- Access the Central Electronics Control Module as described above.
- Enter the original coding that you noted before making any changes.
- Click “Do It!” to save the original settings.
- Verify that the DRLs are now functioning as they did before the modifications.
3.7. Using Adaptation Channels
Some DRL settings are controlled through Adaptation channels rather than Long Coding. To modify these settings:
- Click the “Adaptation” button in the Central Electronics Control Module.
- Select the channel related to DRL control.
- Read the current value of the channel.
- Enter the new value to disable the DRLs. This may involve changing a value from “Active” to “Inactive” or modifying a numeric value.
- Click “Do It!” to save the changes.
- Verify that the DRLs are now disabled and that no fault codes have appeared.
3.8. Example Coding Scenario
Let’s consider an example where you want to disable the DRLs on a 2016 Audi A4. After connecting to the Central Electronics Control Module (09) and opening the Long Coding Helper, you find that Byte 0, Bit 0 is labeled “Daytime Running Lights (DRL) active.” To disable the DRLs, you would:
- Uncheck the box for Byte 0, Bit 0.
- Note the original coding string, for example, “26000091863CAFC00000480300003D0D0F1C4708A2090221000008004000030100000030000000.”
- Enter the modified coding string into the coding field. The new string would be the same as the original, but with the bit corresponding to Byte 0, Bit 0 changed to “0.”
- Click “Do It!” to save the changes.
3.9. Potential Complications and Troubleshooting
While the process of disabling DRLs with VCDS is generally straightforward, some complications may arise:
- Incorrect Coding: Entering the wrong coding can cause unexpected behavior or fault codes. Always double-check the coding before saving changes.
- Module Incompatibility: Some vehicles may have different control modules or coding structures. Ensure that you are using the correct coding options for your specific vehicle.
- Fault Codes: Coding changes can sometimes trigger fault codes. Use VCDS to clear these codes after verifying that the changes have been applied correctly.
- Communication Issues: Problems with the VCDS interface cable or software can prevent communication with the vehicle’s ECU. Ensure that the cable is properly connected and that the software is correctly configured.
3.10. Seeking Expert Assistance from CAR-CODING.EDU.VN
If you encounter any difficulties or are unsure about any step in the process, it is always best to seek expert assistance from CAR-CODING.EDU.VN. Our experienced technicians can provide remote support to guide you through the process, ensuring that the DRLs are disabled safely and effectively.
4. What are the Specific VCDS Coding Locations for DRLs on Different Audi Models?
The VCDS coding locations for Daytime Running Lights (DRL) can vary depending on the specific Audi model and year. Here’s a table outlining common locations for several models. CAR-CODING.EDU.VN can provide precise coding locations for any Audi model.
| Model | Year | Control Module | Coding Method | Location Details |
|---|---|---|---|---|
| Audi A4 (B8) | 2009-2016 | 09 (Cent. Elect) | Long Coding | Byte 0, Bit 0: “Daytime Running Lights (DRL) active” |
| Audi A4 (B9) | 2017-2024 | 09 (Cent. Elect) | Adaptation | Channel “Daytime running lights – DRL activation” |
| Audi A5 (8T) | 2007-2016 | 09 (Cent. Elect) | Long Coding | Byte 0, Bit 0: “Daytime Running Lights (DRL) active” |
| Audi A5 (F5) | 2017-2024 | 09 (Cent. Elect) | Adaptation | Channel “Daytime running lights – DRL activation” |
| Audi A6 (C7) | 2011-2018 | 09 (Cent. Elect) | Long Coding | Byte 0, Bit 0: “Daytime Running Lights (DRL) active” |
| Audi A6 (C8) | 2019-2024 | 09 (Cent. Elect) | Adaptation | Channel “Daytime running lights – DRL activation” |
| Audi Q5 (8R) | 2008-2017 | 09 (Cent. Elect) | Long Coding | Byte 0, Bit 0: “Daytime Running Lights (DRL) active” |
| Audi Q5 (FY) | 2018-2024 | 09 (Cent. Elect) | Adaptation | Channel “Daytime running lights – DRL activation” |
| Audi Q7 (4L) | 2006-2015 | 09 (Cent. Elect) | Long Coding | Byte 0, Bit 0: “Daytime Running Lights (DRL) active” |
| Audi Q7 (4M) | 2016-2024 | 09 (Cent. Elect) | Adaptation | Channel “Daytime running lights – DRL activation” |
| Audi A3 (8V) | 2012-2020 | 09 (Cent. Elect) | Adaptation | Channel “Daytime running lights – DRL activation” |
| Audi A3 (8Y) | 2020-2024 | 09 (Cent. Elect) | Adaptation | Channel “Daytime running lights – DRL activation” |
| Audi TT (8S) | 2014-2024 | 09 (Cent. Elect) | Adaptation | Channel “Daytime running lights – DRL activation” |
| Audi R8 (4S) | 2015-2024 | 09 (Cent. Elect) | Adaptation | Channel “Daytime running lights – DRL activation” |
4.1. Long Coding vs. Adaptation Channels
- Long Coding: Involves modifying a string of hexadecimal characters that represent various settings within the control module. Each byte and bit within the string corresponds to a specific feature or function.
- Adaptation Channels: Involves adjusting specific values within predefined channels in the control module. These channels are typically labeled with descriptive names, making it easier to identify the relevant settings.
4.2. Step-by-Step Guide for Long Coding
- Connect to the Vehicle: Use the VCDS interface cable to connect your laptop to the vehicle’s OBD-II port and launch the VCDS software.
- Select Control Module 09 (Cent. Elect): Click the “Select” button, enter “09,” and click “OK.”
- Access Long Coding: Click the “Coding” button. VCDS will display the current coding string for the module.
- Open Long Coding Helper: Click the “Long Coding Helper” button to open a window that provides a detailed description of each byte and bit.
- Identify DRL Byte and Bit: Locate the byte and bit corresponding to the DRL setting. In the example of the Audi A4 (B8), this is typically Byte 0, Bit 0: “Daytime Running Lights (DRL) active.”
- Modify the Coding: Uncheck the box for the DRL bit to disable the feature. Note the original coding string before making any changes.
- Save the Changes: Enter the modified coding string into the coding field and click “Do It!” VCDS will display a confirmation message.
- Verify the Changes: Turn off the ignition, wait a few seconds, and then turn the ignition back on. Check if the DRLs are now disabled.
- Check for Fault Codes: Click the “Fault Codes” button in VCDS. Clear any new fault codes that may have appeared as a result of the coding changes.
4.3. Step-by-Step Guide for Adaptation Channels
- Connect to the Vehicle: Use the VCDS interface cable to connect your laptop to the vehicle’s OBD-II port and launch the VCDS software.
- Select Control Module 09 (Cent. Elect): Click the “Select” button, enter “09,” and click “OK.”
- Access Adaptation: Click the “Adaptation” button.
- Select DRL Channel: Browse through the available channels to find the DRL-related setting. In the example of the Audi A4 (B9), this is typically labeled “Daytime running lights – DRL activation.”
- Read the Current Value: VCDS will display the current value of the channel.
- Modify the Value: Enter the new value to disable the DRLs. This may involve changing a value from “Active” to “Inactive” or modifying a numeric value.
- Save the Changes: Click “Do It!” to save the changes.
- Verify the Changes: Turn off the ignition, wait a few seconds, and then turn the ignition back on. Check if the DRLs are now disabled.
- Check for Fault Codes: Click the “Fault Codes” button in VCDS. Clear any new fault codes that may have appeared as a result of the coding changes.
4.4. Examples of Specific Coding Changes
- Audi A4 (B8) – Long Coding:
- Original Coding:
26000091863CAFC00000480300003D0D0F1C4708A2090221000008004000030100000030000000 - Modified Coding (DRL Disabled):
26000091863CAFC00000480300003D0D0F1C4708A2090220000008004000030100000030000000(Note: The specific change will depend on the original coding and the exact bit configuration.)
- Original Coding:
- Audi A4 (B9) – Adaptation Channel:
- Channel:
Daytime running lights - DRL activation - Original Value:
Active - Modified Value (DRL Disabled):
Inactive
- Channel:
4.5. Common Issues and How to Resolve Them
- Coding Not Accepted: Ensure that the coding string is entered correctly and that it is compatible with the vehicle’s control module. Double-check the coding and try again.
- Fault Codes After Coding: Clear the fault codes using VCDS. If the codes persist, review the coding changes and ensure that they are correct.
- DRLs Still Active: Verify that the correct byte and bit or adaptation channel has been modified. Some vehicles may have multiple DRL settings that need to be adjusted.
- VCDS Communication Issues: Check the VCDS interface cable and software configuration. Ensure that the cable is properly connected and that the software is correctly configured.
4.6. Why Choose CAR-CODING.EDU.VN for Assistance?
CAR-CODING.EDU.VN offers expert remote support for VCDS coding, ensuring that all modifications are carried out safely and effectively. Our experienced technicians have in-depth knowledge of Audi electrical systems and can provide precise coding locations and step-by-step guidance for any Audi model. We minimize the risk of errors and ensure optimal results, saving you time and potential complications.
5. How to Use VCDS to Enable or Disable DRLs Based on Handbrake Position?
Using VCDS to enable or disable Daytime Running Lights (DRL) based on the handbrake position is a popular modification that allows the DRLs to turn off automatically when the handbrake is engaged. This can be useful in situations where you want to temporarily disable the DRLs without having to manually turn them off. CAR-CODING.EDU.VN can guide you through this process.
5.1. Understanding the Logic
The logic behind this modification is to use the handbrake signal as an input to the Central Electronics Control Module (Module 09). When the handbrake is engaged, the control module detects the signal and disables the DRLs. When the handbrake is released, the DRLs automatically turn back on.
5.2. Step-by-Step Guide for Enabling/Disabling DRLs with Handbrake
- Connect to the Vehicle: Use the VCDS interface cable to connect your laptop to the vehicle’s OBD-II port and launch the VCDS software.
- Select Control Module 09 (Cent. Elect): Click the “Select” button, enter “09,” and click “OK.”
- Access Long Coding: Click the “Coding” button. VCDS will display the current coding string for the module.
- Open Long Coding Helper: Click the “Long Coding Helper” button to open a window that provides a detailed description of each byte and bit.
- Identify the Handbrake DRL Byte and Bit:
- Look for a byte and bit description that mentions “Daytime Running Lights (DRL) deactivation via handbrake” or similar wording.
- The exact location can vary depending on the model and year of the vehicle.
- Modify the Coding:
- Check the box to enable the DRL deactivation via handbrake.
- Uncheck the box to disable the DRL deactivation via handbrake.
- Note the original coding string before making any changes.
- Save the Changes: Enter the modified coding string into the coding field and click “Do It!” VCDS will display a confirmation message.
- Verify the Changes:
- Turn off the ignition, wait a few seconds, and then turn the ignition back on.
- Engage the handbrake and check if the DRLs turn off.
- Release the handbrake and check if the DRLs turn back on.
- Check for Fault Codes: Click the “Fault Codes” button in VCDS. Clear any new fault codes that may have appeared as a result of the coding changes.
5.3. Example Coding Scenario
Let’s consider an example where you want to enable DRL deactivation via handbrake on a 2014 Audi A4. After connecting to the Central Electronics Control Module (09) and opening the Long Coding Helper, you find that Byte 8, Bit 2 is labeled “Daytime Running Lights (DRL) deactivation via handbrake active.” To enable this feature, you would:
- Check the box for Byte 8, Bit 2.
- Note the original coding string, for example, “26000091863CAFC00000480300003D0D0F1C4708A2090221000008004000030100000030000000.”
- Enter the modified coding string into the coding field. The new string would be the same as the original, but with the bit corresponding to Byte 8, Bit 2 changed to “1.”
- Click “Do It!” to save the changes.
5.4. Using Adaptation Channels for Handbrake DRL Control
In some models, the handbrake DRL control may be located in Adaptation channels. To modify these settings:
- Click the “Adaptation” button in the Central Electronics Control Module.
- Select the channel related to DRL control via handbrake. This might be labeled “Daytime running lights – DRL deactivation via handbrake” or similar.
- Read the current value of the channel.
- Enter the new value to enable or disable the DRL deactivation. This may involve changing a value from “Active” to “Inactive” or modifying a numeric value.
- Click “Do It!” to save the changes.
- Verify that the DRLs now respond to the handbrake as intended.
- Check for Fault Codes: Click the “Fault Codes” button in VCDS. Clear any new fault codes that may have appeared as a result of the coding changes.
5.5. Common Issues and Troubleshooting
- DRLs Not Responding to Handbrake:
- Ensure that the correct byte and bit or adaptation channel has been modified.
- Check the handbrake switch for proper function. A faulty switch may not send the correct signal to the control module.
- Verify that the vehicle’s handbrake system is functioning correctly.
- Coding Not Accepted: Ensure that the coding string is entered correctly and that it is compatible with the vehicle’s control module.
- Fault Codes After Coding: Clear the fault codes using VCDS. If the codes persist, review the coding changes and ensure that they are correct.
5.6. Importance of Correct Handbrake Signal
The handbrake signal is crucial for this modification to work correctly. If the handbrake switch is faulty or the signal is not being properly transmitted to the Central Electronics Control Module, the DRLs will not respond to the handbrake position.
5.7. Why Professional Assistance is Recommended
Modifying the DRL behavior based on the handbrake position involves accessing and modifying sensitive control module settings. Incorrect coding can lead to unexpected behavior or system malfunctions. CAR-CODING.EDU.VN offers expert remote support to ensure that the modification is carried out safely and effectively. Our experienced technicians can provide precise coding locations and step-by-step guidance for any Audi model.
6. What are the Common Problems Encountered While Coding DRLs and How to Fix Them?
Coding Daytime Running Lights (DRL) with VCDS can sometimes present challenges. Here are some common problems encountered and how to address them. CAR-CODING.EDU.VN provides solutions to these issues.
6.1. VCDS Not Connecting to the Vehicle
Problem: VCDS fails to establish a connection with the vehicle’s control modules.
Possible Causes:
- Faulty VCDS interface cable.
- Incorrect COM port settings.
- Outdated VCDS software.
- Vehicle ignition not turned on.
- OBD-II port issues.
Solutions:
- Check the Cable: Ensure the VCDS interface cable is properly connected to both the laptop and the vehicle’s OBD-II port. Try using a different USB port on the laptop.
- Verify COM Port Settings: In VCDS, go to “Options” and verify that the correct COM port is selected. Click “Test” to confirm the connection.
- Update VCDS Software: Ensure you are using the latest version of the VCDS software. Download updates from the Ross-Tech website.
- Turn On Ignition: Make sure the vehicle’s ignition is turned on (but the engine does not need to be running) before attempting to connect with VCDS.
- Inspect OBD-II Port: Check the OBD-II port for any damage or debris that might be preventing a proper connection.
6.2. Incorrect Coding String
Problem: Entering an incorrect coding string can lead to unexpected behavior or system malfunctions.
Possible Causes:
- Typos or errors when entering the coding string.
- Using coding values that are not compatible with the vehicle’s control module.
Solutions:
- Double-Check the Coding: Carefully review the coding string before saving any changes. Compare it to known correct values for your vehicle model and year.
- Use Long Coding Helper: Utilize the Long Coding Helper in VCDS to understand the function of each byte and bit. This can help prevent errors when modifying the coding.
- Revert to Original Coding: If you encounter issues after coding, revert to the original coding string that you noted before making any changes.
6.3. Fault Codes After Coding
Problem: New fault codes appear after making coding changes.
Possible Causes:
- Coding changes have triggered a diagnostic trouble code (DTC).
- Incorrect coding settings are causing a system malfunction.
Solutions:
- Clear Fault Codes: Use VCDS to clear the fault codes.
- Review Coding Changes: Carefully review the coding changes to ensure that they are correct and compatible with the vehicle.
- Consult VCDS Documentation: Refer to the VCDS documentation or Ross-Tech forums for information about specific fault codes and their possible causes.
6.4. DRLs Not Responding as Expected
Problem: DRLs do not turn on or off as expected after coding changes.
Possible Causes:
- Incorrect byte and bit settings.
- Conflicting settings in other control modules.
- Faulty DRL components.
Solutions:
- Verify Coding Settings: Double-check the byte and bit settings for the DRLs in the Central Electronics Control Module.
- Check Other Modules: Ensure that there are no conflicting settings in other control modules that might be affecting the DRL behavior.
- Test DRL Components: Use VCDS to perform output tests on the DRLs to verify that they are functioning correctly. Check the DRL bulbs or LEDs for damage.
6.5. Adaptation Channels Not Available
Problem: The required adaptation channels for DRL settings are not available in the control module.
Possible Causes:
- The vehicle model or year does not support adaptation channels for DRL settings.
- The control module is not properly identified by VCDS.
Solutions:
- Check Vehicle Compatibility: Verify that the vehicle model and year are compatible with VCDS and that the specific DRL coding options are available.
- Update VCDS Software: Ensure you are using the latest version of the VCDS software, which may include updated control module definitions.
- Try Long Coding: If adaptation channels are not available, try using Long Coding to modify the DRL settings.
6.6. Security Access Required
Problem: VCDS prompts for a security access code before allowing coding changes.
Possible Causes:
- The control module requires a security access code to prevent unauthorized modifications.
Solutions:
- Enter Security Access Code: Enter the correct security access code for the control module. This code can usually be found in the VCDS documentation or on Ross-Tech forums.
- Contact Support: If you cannot find the security access code, contact Ross-Tech support for assistance.
6.7. VCDS Software Errors
Problem: VCDS software crashes or displays error messages during coding.
Possible Causes:
- Software bugs or glitches.
- Compatibility issues with the operating system.
Solutions:
- Restart VCDS: Close and restart the VCDS software.
- Update VCDS: Ensure you are using the latest version of the VCDS software.
- Check System Requirements: Verify that your laptop meets the minimum system requirements for VCDS.
- Reinstall VCDS: Try uninstalling and reinstalling the VCDS software.
6.8. Module Not Responding
Problem: A specific control module is not responding to VCDS commands.
Possible Causes:
- Faulty control module.
- Wiring issues.
- Power supply problems.
Solutions:
- Check Wiring: Inspect the wiring and connections to the control module for any damage or loose connections.
- Verify Power Supply: Ensure that the control module is receiving power. Check the fuses and relays related to the module.
- Test Control Module: If possible, test the control module with a known working unit to determine if the module is faulty.
6.9. Seeking Expert Assistance from CAR-CODING.EDU.VN
If you encounter any persistent issues or are unsure about how to proceed, it is always best to seek expert assistance from CAR-CODING.EDU.VN. Our experienced technicians